Live Data Reads (Enterprise)
Syntra ODBC normally serves reads from its local cache and writes directly to QuickBooks. On QuickBooks Enterprise editions, Syntra can serve live reads straight from the QuickBooks data store, so your queries can return up-to-the-second data without waiting for a sync.
For the tables it serves, live read takes the place of the cache rather than supplementing it: those tables are read directly from QuickBooks on every query and are not maintained in the local cache. This is deliberate, and it makes deletions and edits always accurate. See Why some tables aren’t cached.
Write operations (INSERT, UPDATE, DELETE) always go to QuickBooks in real time. This page is about read latency.
Supported editions
Section titled “Supported editions”| QuickBooks edition | Cached reads | Live reads | Writes |
|---|---|---|---|
| Desktop Pro (2018+) | Yes | No | Yes |
| Desktop Premier (2018+) | Yes | No | Yes |
| Desktop Enterprise (2018+) | Yes | Yes | Yes |
Live reads are an Enterprise-only capability. The feature relies on the custom-reporting ODBC surface that Intuit ships exclusively in QuickBooks Enterprise. On Pro and Premier, Syntra ODBC still gives you every other feature of the product: 120+ tables, full SQL, INSERT/UPDATE/DELETE, the MCP server, and smart caching. The only thing you lose without Enterprise is the zero-latency live-read path.
Why live reads matter
Section titled “Why live reads matter”When Syntra is serving from the local cache, your queries hit a fast local SQL engine and return in milliseconds. The cache is refreshed in the background on adaptive polling tiers (see Caching). For most analytical workloads this is the right tradeoff: fast reads, minimal load on QuickBooks itself, and data that is at most a few minutes old.
Sometimes you need stricter freshness:
- Verifying a write you just made. You inserted a transaction two seconds ago and want a query to reflect it immediately.
- Dashboards that must reconcile to the penny against what the QuickBooks GUI shows right now.
- Concurrent analytical queries from multiple users that would otherwise compete for a single live QuickBooks session.
- Querying when QuickBooks Desktop is not running. Live reads do not require an interactive QuickBooks session.
On Enterprise, live reads solve all of the above.
Setup walkthrough
Section titled “Setup walkthrough”Live reads require two steps: create an ODBC user inside QuickBooks Enterprise (so Syntra can authenticate), then point Syntra at that user from the Settings tab.
Step 1: Create the ODBC user in QuickBooks Enterprise
Section titled “Step 1: Create the ODBC user in QuickBooks Enterprise”ODBC users are separate from QuickBooks login users. You create them once per company file. Any ODBC-capable tool, including Syntra ODBC, uses these credentials to authenticate.
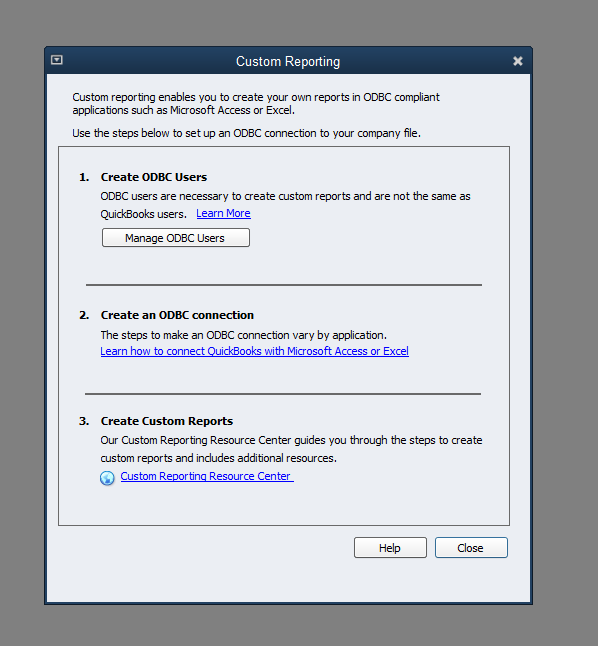
1a. Open QuickBooks Enterprise as an Admin user, then go to Reports > Custom Reports > ODBC.

1b. The Custom Reporting dialog opens. Click Manage ODBC Users.
1c. The New ODBC User dialog appears. Enter a user name (for example, syntra), a password of at least six characters, and confirm the password.
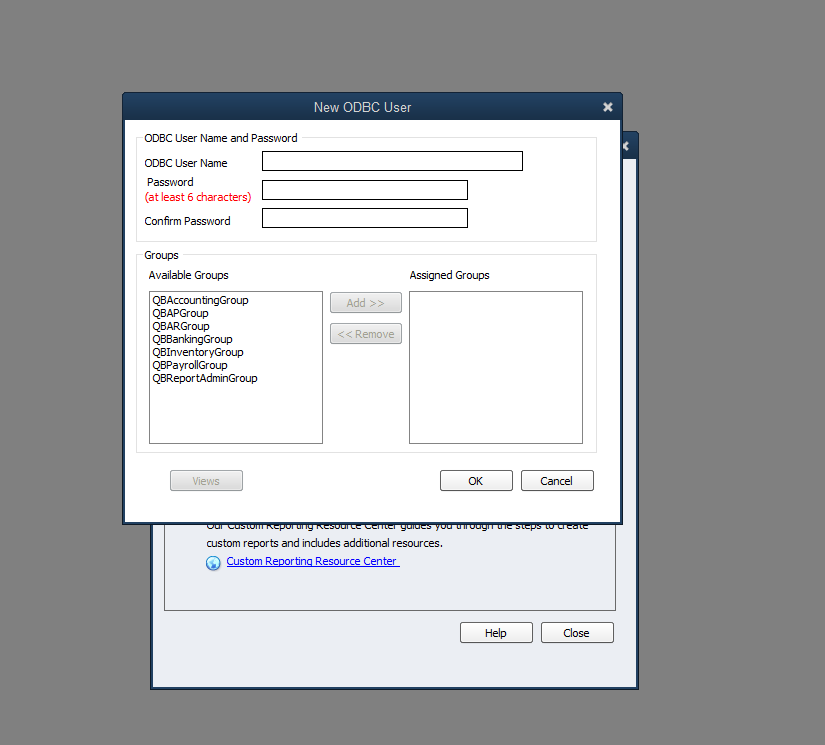
1d. In the Groups panel, move every group from Available Groups to Assigned Groups using the Add >> button. Syntra needs access to every group so it can expose the full 120+ tables to your SQL clients. If you only move some groups, the tables backed by the omitted groups will return empty results.
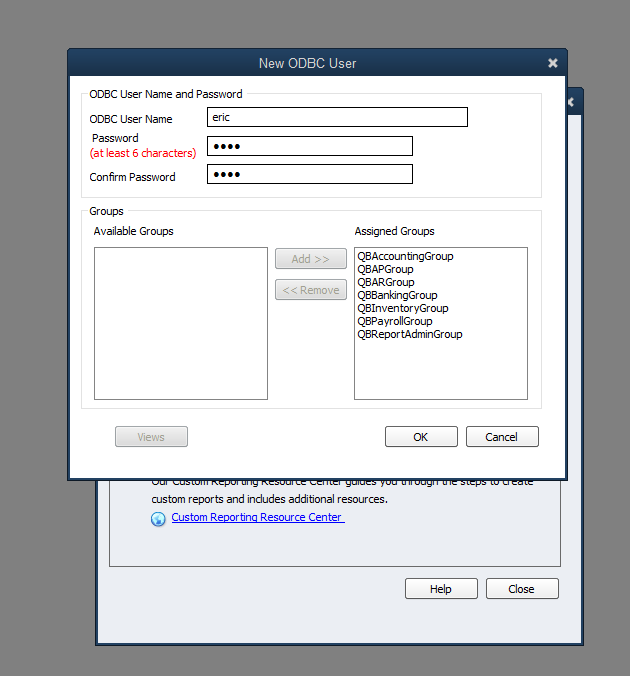
1e. Click OK to save the user, then Close the Custom Reporting dialog.
Step 2: Enable live reads in Syntra ODBC
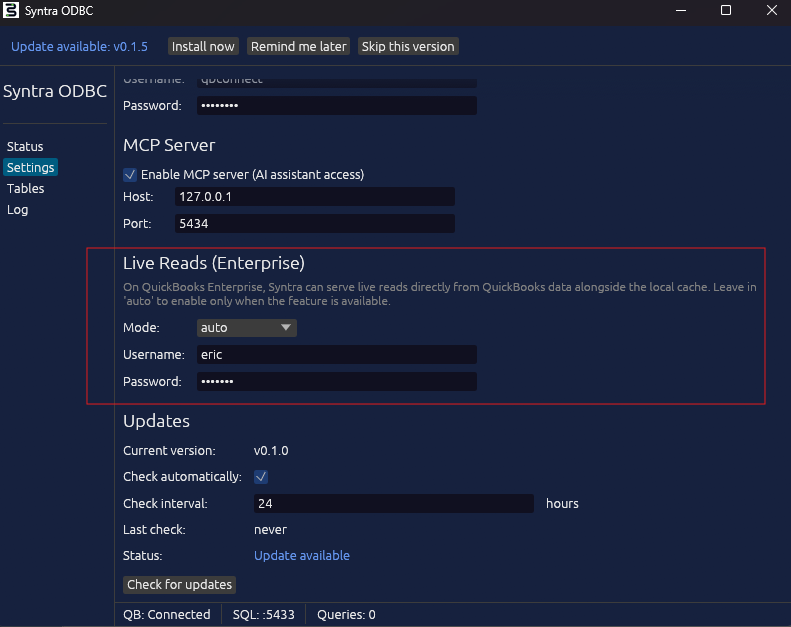
Section titled “Step 2: Enable live reads in Syntra ODBC”2a. Open the Syntra ODBC app and click the Settings tab. Scroll to the Live Reads (Enterprise) section (it sits between MCP Server and Updates).
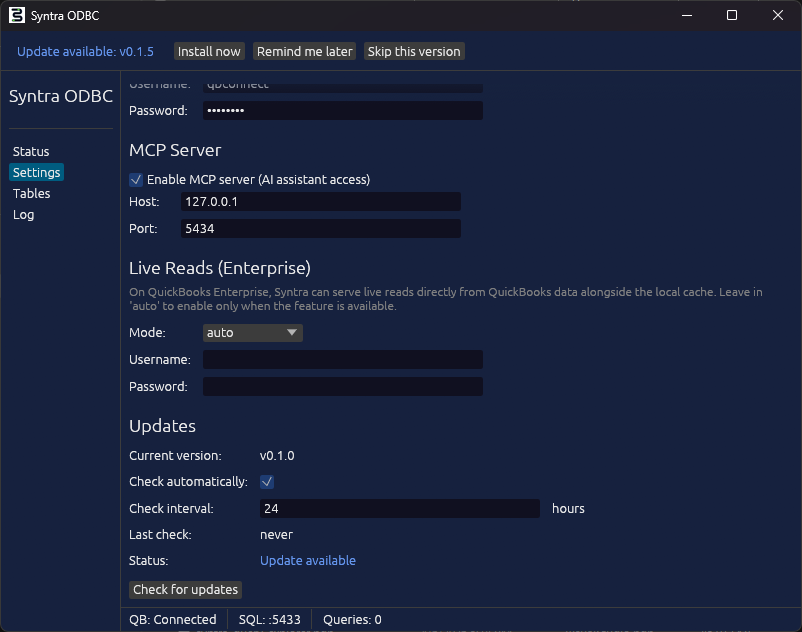
2b. Fill in the three fields:
- Mode: leave on
autoto let Syntra detect Enterprise automatically and turn the feature on only when it is available. Set toenabledto force it on (fails loudly on Pro/Premier) ordisabledto force it off. - Username: the ODBC user name you created in Step 1c (for example,
eric). - Password: the ODBC user password from Step 1c.
2c. Click Save Settings at the bottom of the Settings tab. Syntra rewrites config.toml with the new values and a small label reminds you a restart is required.
2d. Quit and relaunch Syntra ODBC. On the Status tab, confirm the Cache line switches from “live-fetch mode” to “live-reads (Enterprise)” once Syntra connects.
Your queries now use the live-read path automatically whenever it is the fastest valid source.
How Syntra picks a source for each query
Section titled “How Syntra picks a source for each query”Each SELECT query is routed to the fastest valid source, in this order:
- Live read (Enterprise only, when the
[odbc]config is enabled and the connection is healthy). - Local cache (when the cached data is fresher than the query’s
QB_MAX_STALENESS). - Live QuickBooks fetch (the last-resort read path; requires QuickBooks Desktop to be running).
Writes always go through path 3. Path 1 is read-only.
You can force a specific tier from your client:
-- Bypass the cache entirely, force the freshest available readSET QB_MAX_STALENESS = 0;
-- Accept data up to 5 minutes old (prefers cache when it is fresh)SET QB_MAX_STALENESS = 300;
-- Reset to the config defaultRESET QB_MAX_STALENESS;
The equivalent config.toml section
Section titled “The equivalent config.toml section”If you prefer to edit the config file directly instead of using the Settings tab, both surfaces write the same section:
[odbc]# "auto" detects Enterprise automatically, "enabled" forces on, "disabled" forces offmode = "auto"# ODBC user name and password created in QuickBooks Enterprise# (Reports > Custom Reports > ODBC > Manage ODBC Users)username = "syntra"password = "your-odbc-user-password"Save and restart Syntra ODBC for the change to take effect. The Settings tab and config.toml stay in sync: edits in one surface show up in the other the next time it opens.
Limitations
Section titled “Limitations”- Requires QuickBooks Enterprise. Pro and Premier do not ship the custom-reporting ODBC surface that this feature relies on. Everything else in Syntra ODBC works on Pro and Premier identically.
- Requires an ODBC user. You must create the user inside QuickBooks Enterprise as described above. QuickBooks login credentials are not the same thing and will not work.
- Read-only. Writes always go to QuickBooks through the standard write path, which requires QuickBooks Desktop to be running.
- All groups must be assigned to the ODBC user. A user with only a subset of groups will silently return empty results for tables backed by the omitted groups.
- Schema completeness. A handful of computed fields available through the QuickBooks SDK may not be available on the live-read path. When that happens, Syntra automatically falls back to the cache or the SDK path for that query.
Fallback behavior
Section titled “Fallback behavior”If live reads are enabled but the connection fails (for example, if the company file is temporarily locked during a QuickBooks backup, or the ODBC user credentials are wrong), Syntra ODBC automatically falls back to the local cache or the SDK live path, depending on the query’s staleness requirement. Your application keeps working without needing to handle the error.
Troubleshooting
Section titled “Troubleshooting”Mode is auto but live reads are not happening. Confirm you are on QuickBooks Enterprise (Pro and Premier do not support this feature). Check the Log tab for messages mentioning odbc or live read at startup. Incorrect credentials show up as authentication errors during the first connection attempt.
Queries return empty rows for some tables. The ODBC user in QuickBooks Enterprise is missing groups. Go back to Step 1d and make sure all seven groups are in the Assigned Groups column. Save and restart Syntra.
“Live reads disabled” appears on startup even with Mode = enabled. QuickBooks Enterprise must be installed and the company file must have been opened at least once. For first-time setup, open the company file in QuickBooks, run through Steps 1a-1e, then start Syntra.
See also
Section titled “See also”- Caching - how the local cache and adaptive polling tiers work
- Performance - tuning tips for both paths
- Configuration - the full
config.tomlreference